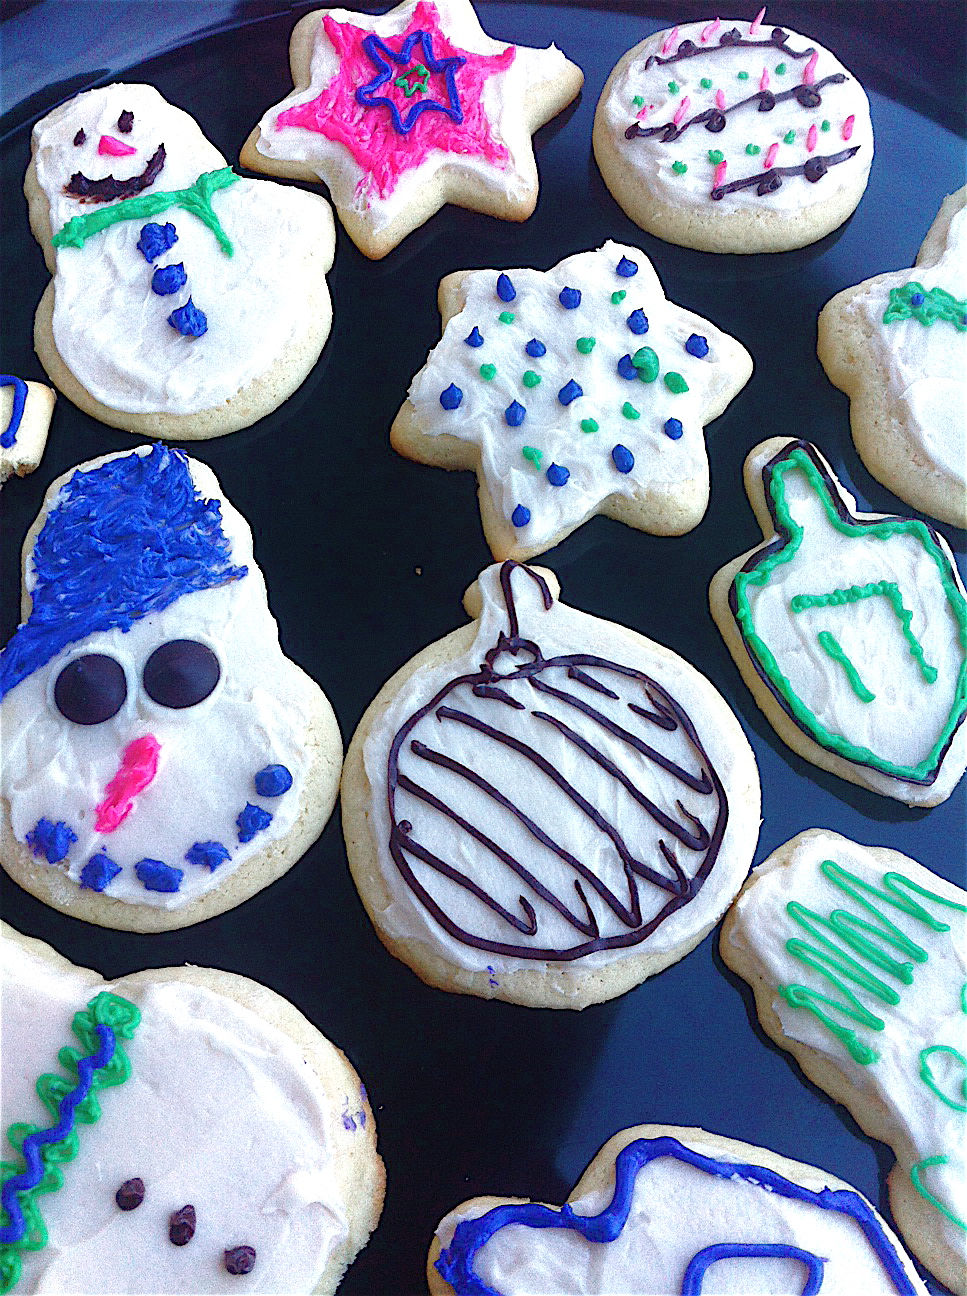
There are two types of sugar cookies that are best around the holidays. The first is like a shortbread cookie: crunchy, buttery, and thin. These are perfect for making cookies that really hold their shape and can hold a lot of icing. The second is the soft sugar cookie: the pillowy, chewy kind that sort of melt in your mouth as you eat them. These were my choice for making holiday cookies this year. What I love about baking cookies is the experience of making them. Ryan seemed to pop his head in around the time that they were coming out of the oven, and how can’t you? The smell is like you are sitting right in the middle of a cookie jar. After they cooled we had a lot of fun playing with the decorations. Can you guess which are mine and which are Ryan’s? He has a better sense of cookie humor….

Makes: 2 dozen cookies
Prep Time: 20 minutes Baking Time: 15 minutes Total Time: 35 minutes
For Cookies:
1/2 cup (1 stick) butter, room temperature
1 cup sugar
1 egg
1 tsp vanilla extract
1 tsp almond extract
1/2 cup reduced fat sour cream
pinch of salt
1 tsp baking soda
2 3/4 cup all purpose flour
Cookie Cutters
Food Coloring, if desired
Sprinkles, if desired
For Icing:
1/3 cup reduce fat cream cheese, room temperature
1/4 cup butter, room temperature
3 cups powdered sugar
2 tsp vanilla extract
1/4 cup – 1/3 cup milk
- Preheat the oven to 375 degrees. Grease 2-3 large cookie sheets and set aside.
- Whip the butter and sugar together with a mixer until the butter is light and fluffy, about 2 minutes.
- Add the egg, vanilla and almond extracts, and sour cream to the bowl, mixing until combined.
- Add the salt, baking soda, and 1 cup of the flour to the bowl. Mix on the lowest speed until just incorporated.
- Scrape the bowl, add another cup of flour, and mix until just incorporated.
- Add the remaining 3/4 cup flour and mix until just combined.
- Remove the dough onto a well floured surface and shape into a ball. Lightly flour a rolling pin and roll the dough until it is about 1/3 – 1/2 inch thick. You want them to be pillowy, so make sure you don’t roll them too thin. Use your cookie cutters to cut out as many shapes as you can in the dough. Remove the cut outs with a spatula and place the cookies about 1 inch apart onto the cookie sheets.
- Form the remaining dough back into a ball and roll out again, cutting as many shapes as you can. The less times you can do this, the better your last cookies will turn out. The more rolling and flour incorporated back into the dough, the less chewy your cookies will turn out.
- Bake the cookies for 6 minutes. They may not look completely done after six minutes, but remove from the oven and let cool on the counter. After about 5 minutes, move the cookies onto a cooling rack. Cool at least 1 hour before frosting.
- To frost the cookies: make the frosting by whipping the butter and cream cheese in a mixer. Add the vanilla and the powdered sugar, mixing on low so that you don’t have a sugar cloud in your kitchen. Add the milk as desired to create a smooth buttercream.
- From here, the choices are up to you! The cookies look perfectly great if you just ice them in a single color. I recommend using a small icing spatula for icing the entire cookie. This gives them a very smooth finish. If you wish to be more creative, keep half of the icing as white, and disperse the other half of the icing into 3-4 bowls. Color each a different color and mix together well before using. Get creative for beautiful cookies and a fun afternoon of family time!
- Let the cookies sit at room temperature for about 30 minutes after icing them so that the frosting holds. Store in a covered container for best results.